Basic ideas for setting up a home video studio for online courses
![[object Object]](http://images.ctfassets.net/ly25iagmtxce/4xvntI2O55Ie9IQgOJRJbs/2ced1262a272efde3e998f3a5acb66ee/kelly-huang-2bZnaKfM2JA-unsplash.jpg)
Photo by Kelly Huang on Unsplash
Creating an online video course does not require much hard work, but it requires adequate planning. For the material to pique the intended audience's attention, it must be professionally made.
This is why it is worth looking into some fresh and innovative home video studio setup ideas to ensure that your working space is adequately equipped. While it may seem daunting at first, setting up a home video studio is not as complicated as it appears, and the best part is that you don't need to spend a fortune to do so. Wondering how to build such a studio to record the best video and content?
Stick with the Workee team and learn how easy it is to set up the best video studio on a shoestring budget. In this article, we'll give tips on inexpensively arranging a studio at home to produce the best online courses.
#Tip 1. Find the ideal spot for your filming studio setup
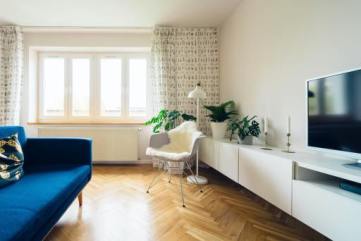
The first step is to decide on the right location to set up. This is where the bulk of the shooting will take place, so pick a space in your apartment that's visually appealing and convenient for filming ( it doesn't have to be an entire room, it can be a nice spot in your apartment).
The content you'll be putting up can also help influence your background. For example, the kitchen is the right setting if you teach an online culinary class. If you're teaching a sewing course, your background may include fabric spools or a sewing machine on the shelves behind you and other props.

Another great tip is to choose a spot with great natural lighting. The camera should be placed in front of a window, with the lens pointing towards the opposite wall. This allows the light to be distributed uniformly around the figure, eliminating the need for an additional artificial light source to illuminate the image. Overall, the composition of the area should be in harmony.
#Tip 2. Improve your room acoustics, find ways to reduce background noise
Paying attention to acoustics should be high on your priority list, regardless of how much or how little of the space you intend to make into a video camera set up studio. It is said that audio quality is often more important than video quality, and we fully agree. It's impossible to view a beautiful video without audible audio, but an average video with great audio can be watched since it will still convey its message.

Pro tip- You want to make sure you soundproof the space adequately. Begin by dampening the room to eliminate reverberation and echoes.
The more objects in the room, the less reverberation because these objects will either scatter or absorb the sound waves reflected into the room. The ideal solution will be to purchase absorbing panels or acoustic foams and install them on the walls. However, this is a long-term solution; not everyone wants to convert their space into a full-fledged studio.
Another tried and inexpensive solution is to create blanket walls, lay a carpet on the floor, use 'fleshy' window curtains, bookshelves, boxes of shoes, and so on. With only a bit, you can get rid of reverberation and have good-sounding audio in your videos.
#Tip 3. Plan and consider your options before making a purchase
Once you've found the right location and have the echo issue under control, you're halfway to having that professional video studio setup of your dreams. It's now time to get the necessary tools you'll need to get you up and running.
Good news: if you're willing to put your creative juices to use, you can build an awesome home video production studio on almost any budget. Don't get carried away and spend your time and effort on review sites hunting for the greatest videography equipment; these things are pricey! It's important to bear in mind that you don't need to spend a lot of money on costly equipment to create high-quality videos for your courses. However, if money isn't an issue, you're more than welcome to visit these sites.
Finally, before deciding which home video studio equipment and software to buy, ensure they are compatible. Furthermore, make certain that whatever you purchase is required to suit a certain demand, so you don't waste money on the things you don't need.
#Tip 4. Get the right equipment for your home video recording studio
In a perfect world, high-end professional lighting, special audio with visual systems, displays, and even someone to do the recording for you would be nice, right? Of course, but if you're like most people who want to produce high-quality videos on a budget, all you need are basic and inexpensive tools to get the ball rolling. The following are absolute necessities:
Video cameras
When making video recordings, having a camera is essential. Start with the basics if you're on a tight budget and want to start a simple video studio. A smartphone camera has enough capacity to do what you need for a home video studio. You can use a tripod or a nice USB webcam with your smartphone. If you don't mind spending some money, you could get a digital camera with an HDMI output or one that can be used as a webcam when connected to a computer via USB.
Microphones
Using the microphone on your smartphone to create an informative video is not the best option. Video recording with microphones built into smartphones or laptops can only go so far, and it will also appear unprofessional to the viewer. Therefore, it is important to choose the right microphone. You may get a professional microphone that delivers clear audio with no background sounds, or even a low-cost microphone will provide better sound quality than your cell phone or laptop. Investing in a tie-bar microphone (which is clipped to the shirt) or a headband microphone is worthwhile.
Lighting

One of the most significant aspects of creating a video is the use of light. Light brings an image to life. If you don't have enough natural light in your space, you'll need lighting equipment for your video setup. Ring lights can also be used in your home video studio to provide lighting. A diva light serves as an affordable option. You may mount the diva light on the ceiling or the floor. A ring light distributes the light evenly over your subject. It also makes any imperfections less noticeable. Also, consider buying led lamps and covering all windows. This way, you can work under fully controlled settings, and the recorded material will always be consistent since it is always lighted similarly. Furthermore, effective light diffusion is essential for softening and diffusing light, which will make your recordings appear more professional.
Other accessories
Other items may be added to round out your DIY video studio setup. A camera tripod can help you keep your camera in place. A tripod adapter is useful because it converts your tripod into a holder for a mobile device, which is useful for filming with your smartphone.
Software for editing
The last piece of your home video studio setup puzzle is editing. You can use free or paid alternative video editing tools available on the internet. We recommend video editing software that allows you to easily add elements such as text boxes and highlights and record anything on your computer screens – such as presentations or anything else you want to display in a Web browser.
Conclusion
While creating an online video course, you may have to assume many roles, including the camera guy, the sound and lighting technician, and the presenter at the same time. Not to mention other aspects, such as branding and finances. So, right from the start, you can get help from professionals to help lighten this load. Workee is a one-stop, user-friendly website where coaches and tutors can create their own professional website, book online coaching courses, use online video communication tools, bill customers and get paid for their services, manage taxes in real-time, and much more.


