
Set Up Online Booking for Your Med Spa – 7-Step Guide (Workee)
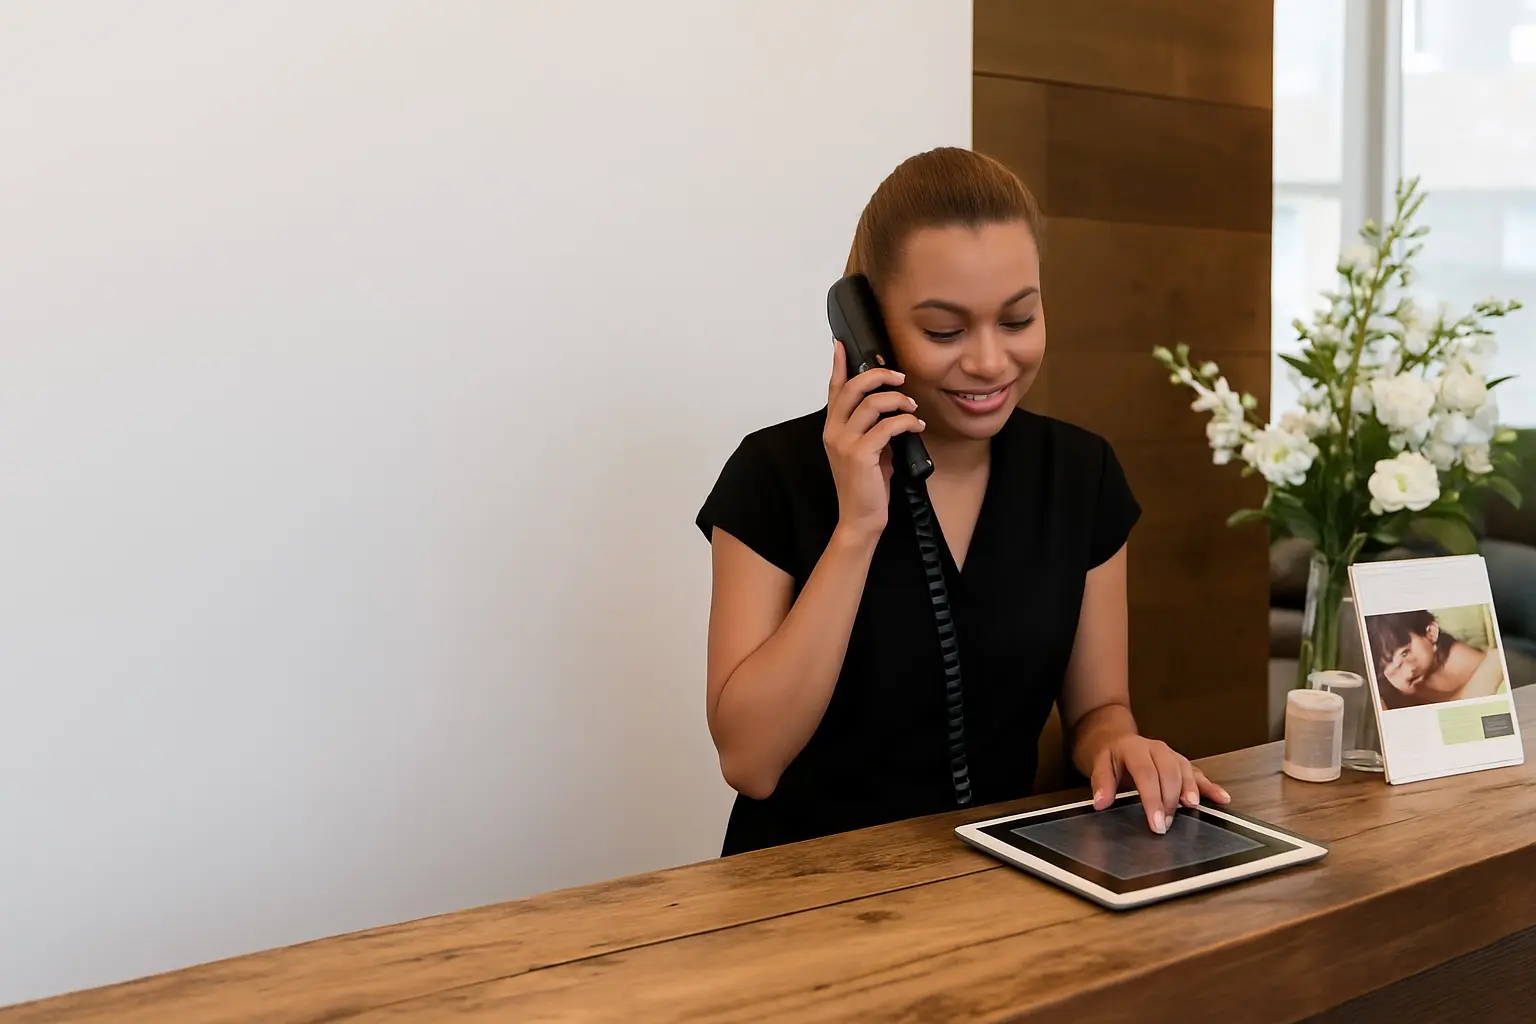
Online booking is no longer optional. Today’s med spa clients expect a seamless, self-service experience where they can book appointments 24/7, without back-and-forth calls or DMs. Whether you’re running a solo Botox practice or a multi-provider wellness clinic, an online booking system isn’t just about convenience — it’s about converting more traffic into actual appointments.
This guide walks you through every step of setting up a professional, client-friendly booking system using Workee. It covers everything from setup and customization to integration, client communication, and optimization — with real-world examples and optional extras like building your own website or syncing your marketing tools.
🪄 You don’t need a developer or IT support to follow this guide. Just a little time, your service list, and the willingness to test it from the client’s side.
Step 1: Create Your Workee Account and Profile
Visit workee.net and sign up for a new account. It only takes a few minutes to get started. If you'd like someone to walk you through setup live, you can schedule a free onboarding call with the Workee team.
During initial signup:
Add your business name (e.g. Radiant Glow Med Spa)
Upload your logo or a profile image
Enter your contact details and business type
Choose your brand colors and fonts for a cohesive, professional appearance
Once created, Workee will generate a unique booking page URL for your spa (e.g. my.workee.net/yourspa). You can customize this to match your brand name.
Tip: Use your spa name in the URL to keep it clean and trustworthy — this also makes it easier to promote.
Step 2: Set Up Your Booking Site (or Use Workee as Your Website)
Workee lets you either:
Embed booking into your existing website
Use Workee as your complete client-facing website (no need for a separate site)
Once you’re in your dashboard, go to the Website tab to start customizing.
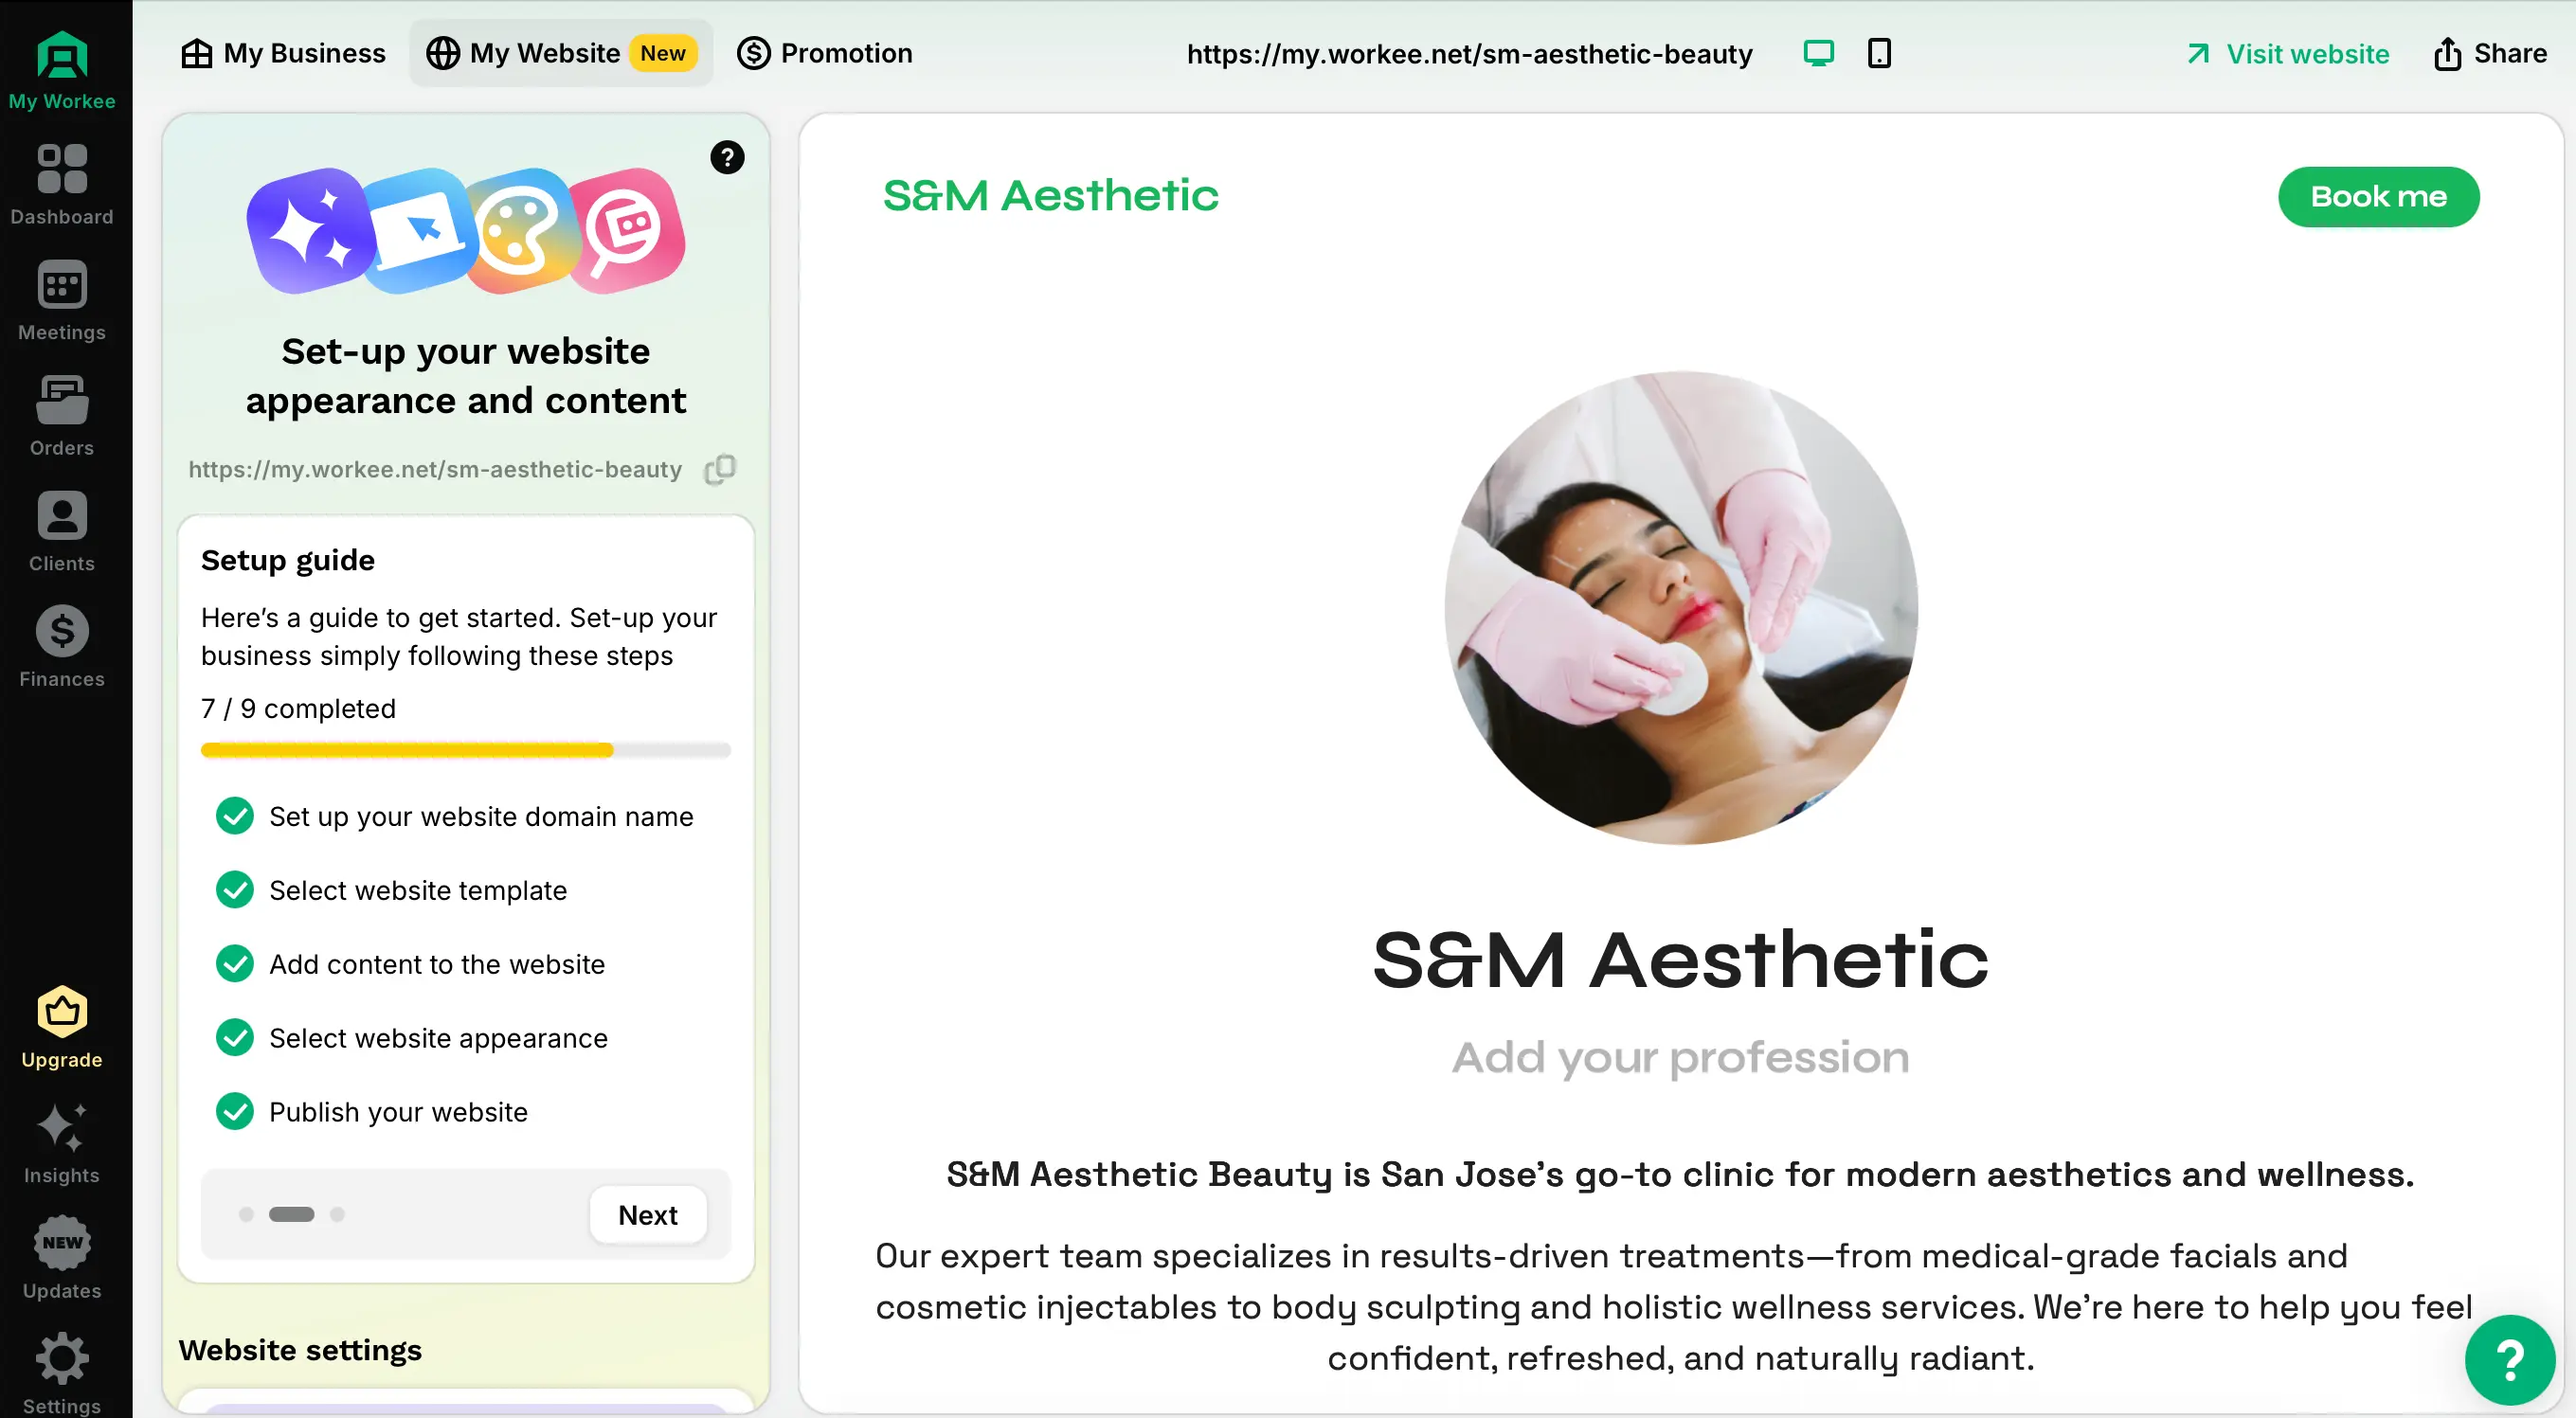
1. Choose a Website Template
Pick a layout that suits your brand — clean, modern, luxury, minimal. You can switch templates later if needed. Each one supports service blocks, booking buttons, services, products, and more.
2. Customize Your Branding
Under Website Settings > Design & Templates, personalize the look:
Set your font and color scheme
Add your logo and background images
Choose layout spacing, button shapes, and text styles
This helps create visual trust and makes the experience consistent with your Instagram, print materials, or physical space.
3. Add Sections to Your Website
Under the Content tab, you can add or hide sections:
Hero section (with a bold headline or photo)
Booking calendar (your actual services)
About your team or business
Testimonials or client reviews
Digital products or packages (if applicable)
Social media links, email, WhatsApp, etc.
Footer with contact info, disclaimers, or cancellation terms
Add what you need — and remove what you don’t. This is modular.
4. Add SEO and Analytics (Optional but Smart)
In Website Settings > Search Engine Info, set your:
Page title (e.g. “Botox & Skin Clinic in San Diego – Book Online 24/7”)
Meta description (a short description that shows in Google)
Also:
Enable Google Analytics or connect a Meta Pixel
Workee’s AI assistant can surface booking trends and drop-off points over time
5. Publish Your Booking Site
Once your structure and branding are set, click Publish. You now have a live, professional site — even if you never had one before.
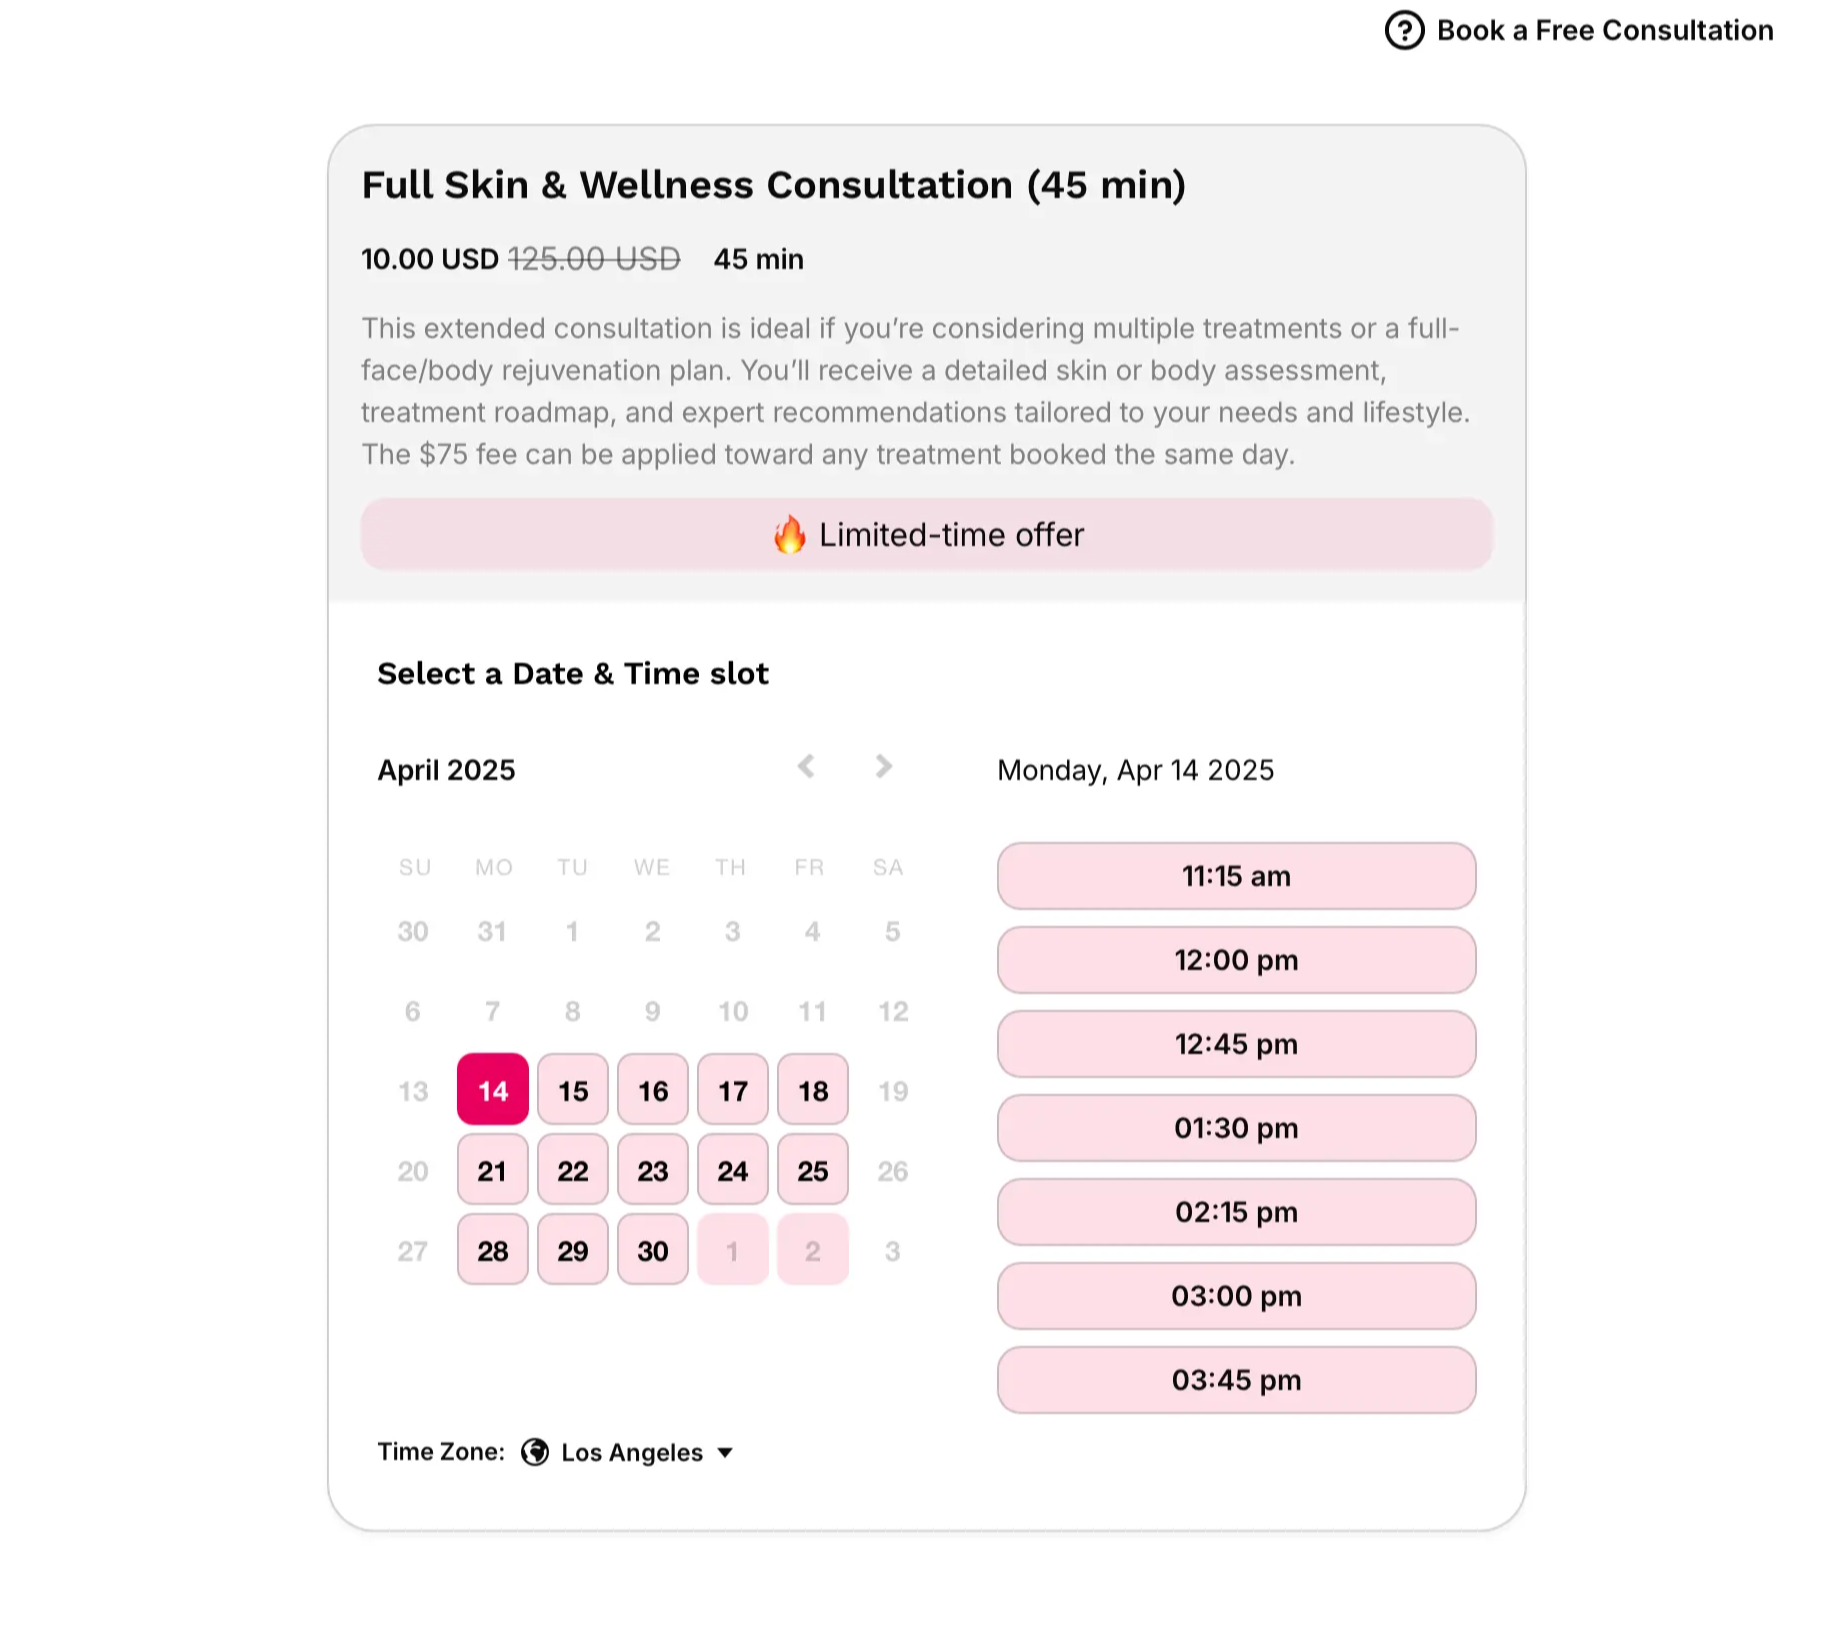
Step 3: Add Services and Define Availability
This is where your booking system starts to take shape — it’s the part clients actually interact with when they choose and schedule an appointment.
1. Add Each Service (Time Slot)
Go to Bookings > Services and add each bookable appointment type. For each one, you can define:
Name (e.g. "Lip Filler Consultation")
Duration (e.g. 30 mins)
Price or deposit
Buffer time (e.g. 10 mins for cleanup or turnover)
Description (mention pre-visit requirements, who it’s for, or what's included)
Group services into categories like “Injectables,” “Facials,” “Consultations,” etc. to help clients skim and select quickly.
For example, you might create:
“New Client Aesthetic Consultation – 30 min – $50” (or mark it free if you offer free consults)
“Botox Injections – 45 min – $X per unit or session” (you can note pricing details in the description if it varies)
“Signature Facial – 60 min – $120”
“Laser Hair Removal (Small Area) – 30 min – $75”, etc.
You can also:
Make a service public or private (e.g. for internal use or manual booking only)
Add recurring sessions (for packages or memberships)
Use Workee’s digital product feature to sell skin-care or at-home bundles
2. Set Your Availability (or Staff Schedules)
If you’re solo, go to Availability Settings and define your hours (e.g. Mon–Fri 10–5). If you have a team:
Set schedules per provider
Assign services to specific staff (e.g. only Nurse Jamie does Botox)
Workee automatically prevents double-booking
You can also:
Sync with Google Calendar to block out unavailable times
Tip: Workee shows clients only the time slots that match their selected service and available provider — no manual juggling required.
Step 4: Set Payments, Policies, and Notifications
You control how clients pay and what happens if they cancel. This is where Workee becomes more than a calendar — it becomes a front desk replacement.
1. Payments
Connect Stripe or PayPal under Settings > Payments to:
Collect full payment upfront (ideal for flat-rate services)
Accept deposits (useful for high-value bookings or long appointments)
Store a card on file (to charge a no-show fee if needed)
You can explain payment terms in the service description (e.g. "Deposit non-refundable if canceled with less than 24 hours’ notice").
2. Cancellation / No-Show Policies
Under Settings > Booking Preferences, define:
How far in advance clients can cancel or reschedule (e.g. 24 hours)
What happens if they don’t show
You can also:
Add policy text to confirmation emails
Display a cancellation policy in your website footer
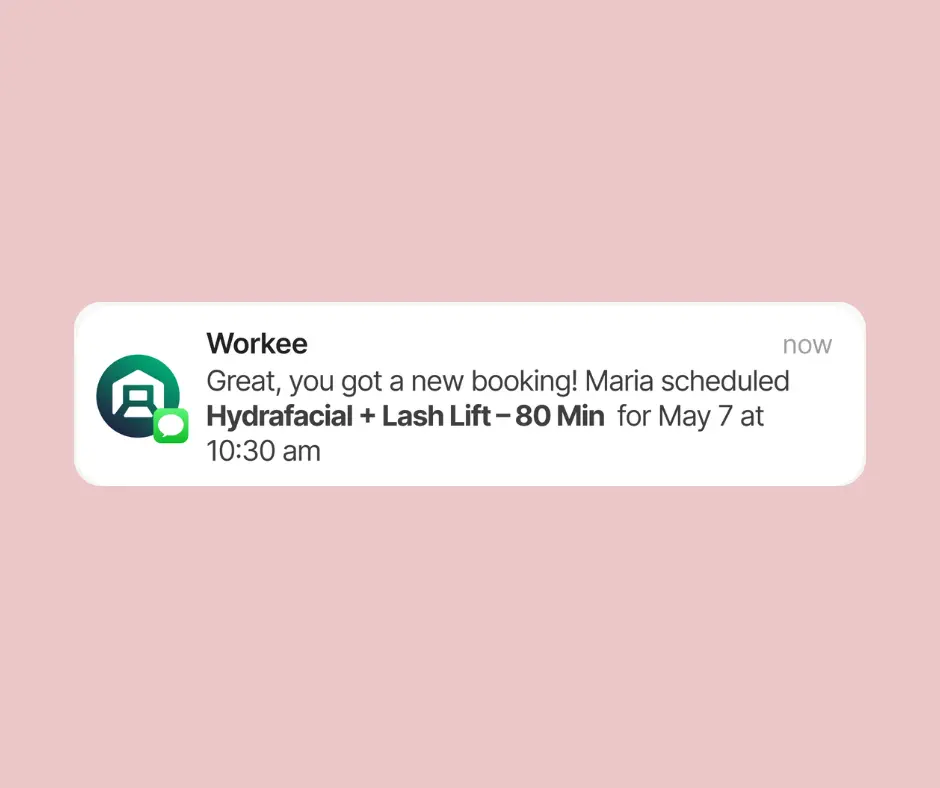
3. Confirmation and Reminder Messages
Go to Notifications and:
Enable confirmation messages (email, WhatsApp, or SMS)
Add reminders (e.g. 48 and 2 hours before appointment)
Customize content for tone and clarity
Reminders reduce no-shows by 50% or more.
🚀 Launch with Confidence
Not sure where to start? Our team can guide you through setup, connect your calendar, and test it live with you. Let’s get your spa bookable 24/7.
Step 5: Embed or Link Your Booking Page Everywhere
With your shiny new booking page ready, the next step is to make sure clients can find and use it easily. “Integrating” your online booking means putting the link or widget wherever your customers are, so booking with you is effortless. Here’s how to weave online scheduling into all the places your business lives online:

1. On Your Website
If you already have a website (on Squarespace, Wix, WordPress, etc.):
Go to Workee > Website Settings > Embed to Website
Copy the HTML embed code
Paste it into your "Book Now" or "Appointments" page
This creates an inline booking experience right on your site. If you can’t embed:
Add a button or menu link that opens your Workee booking page in a new tab
Include text like "Book Online – 24/7 Self-Scheduling"
Visibility Tip: Put the link in the header, footer, and on every key service page.
2. On Instagram, Facebook, and Google
Instagram: Put your booking link in your bio (as the website link). You can say in your bio description “📅 Book appointments online at any time – click below!”. Instagram also has a feature for businesses to add a “Book Now” button on their profile, but it only supports certain partner scheduling apps; if Workee isn’t directly integrated, the bio link is your best bet. You can also use Instagram Stories with a link sticker to periodically remind followers that they can schedule with you easily online.
Facebook: On your Facebook business page, use the call-to-action button feature. Edit the button (usually it’s right below your cover photo) to be a “Book Now” button and paste in your Workee booking page URL. This way, anyone visiting your Facebook page can click and go straight to scheduling. Also consider posting about your online booking – e.g. an announcement post: “We’re excited to offer online booking! You can now schedule your treatments anytime, anywhere – just click Book Now on our page or visit [your link].” Pin that post to the top for a while so visitors see it.
Other Platforms: If you use LinkedIn, Twitter, TikTok or others for your business, include the booking link in the profile or occasionally in posts. For example, on LinkedIn you might put the booking link in your contact info or About section for your business page.
Google Business Profile: Don’t overlook this crucial spot. On your Google Business Profile (the listing that appears on Google Search/Maps for your spa), there is an option to add an “Appointment URL.” Log in to your Google Business dashboard, find the section to update website/links, and paste in your booking page link as the appointment link. Once added, clients who find you on Google will see a “Book Appointment” button – which can significantly increase bookings from search. Many people search “med spa near me” and want to book right then; this enables that. Ensure your information (hours, phone, etc.) is up to date there as well, so Google shows the correct details along with the booking button.
3. Email and Text Communications
Update your regular communications to always include a booking option. Examples:
Add a line (with hyperlink) in your email signature: “Schedule your next appointment online: [Book Now](your Workee link)”.
If you send out email newsletters or promos, incorporate a “Book Now” call-to-action in those emails.
You can even use Workee’s integration with WhatsApp or SMS to make booking interactive. Workee supports WhatsApp messaging on certain plans, meaning you could drop a booking link in a WhatsApp chat or auto-reply. If a client texts asking for an appointment, you (or an automated reply) can send back “Sure! Here’s a quick link to book the time that works for you: [link].”
4. In-Store and In Conversation
Put a small sign at your reception or check-out desk: “Skip the call next time – book your next appointment online 24/7 at [your URL]!” You could even generate a simple QR code that points to your booking page, print it and display it, so clients can scan and book on the spot or later.
Train your staff to mention it: when a client checks out, instead of only saying “Call us to book your next visit,” add “You can also book online through our website or app anytime – whichever is easier for you.”
If you have brochures, business cards, or aftercare instruction sheets, include the booking link or a note about online scheduling on those materials too.
Step 6: Test and Optimize
Before you send your first clients to the booking page, make sure it works exactly how you intend. Think of this as a soft launch.
1. Book a Test Appointment (Desktop + Mobile)
Go through the full flow yourself:
Visit your booking link as a client
Select a service, choose a time, and book it
Make sure confirmation emails/texts arrive
Cancel or reschedule from the client side and watch how the calendar updates
Repeat this on mobile. If you embedded the widget into your site, test the experience for mobile users — scrolling, responsiveness, and tap targets.
2. Review What Clients See
Check your service names — are they clear?
Is there too much or too little information in the description?
Is the price obvious and upfront?
Often, vague service names like “Facial – 60 min” can confuse clients. Be specific: “Hydrafacial – Deep Clean + Hydration (60 min)”
3. Review the Backend
Make sure each test booking shows on the right calendar
Check if Google Calendar sync is working (if connected)
Confirm staff notifications are firing
Adjust service order or naming based on what feels most intuitive
4. Get Real Feedback
Ask a friend, colleague, or loyal client to test your booking flow. Give them a prompt like: “Pretend you’re a new client trying to book a facial next week. What’s confusing or missing?”
You’ll often get small but important feedback like:
"I didn’t know how to choose between two options."
"The form didn’t mention parking info."
"I thought I was done but had to scroll down more."
5. Watch the Data
After going live, check Workee analytics:
Are people starting bookings but not finishing?
Are some services never selected?
Are certain days consistently full or empty?
This will help you:
Rename or reposition services
Extend high-demand hours
Consider promotions for under-booked days
Optimization is ongoing. Expect to make small tweaks weekly or monthly.
Step 7: Promote Your Booking System
Now that your setup is tested and working — promote it. Just publishing the link isn’t enough. You need to build habits with clients and followers.
1. Create a Booking Call-to-Action Everywhere
"Book Online – Available 24/7"
"Click here to schedule your next treatment in under 60 seconds"
"No login required. No app. Just pick a time and go."
Use this language consistently:
Instagram bio and captions
Email signature and newsletters
Facebook posts or link in bio tools
In DMs — send your Workee link instead of replying manually
2. Train Your Team
Receptionists, estheticians, and even assistants should know to:
Mention online booking at checkout: “You can book your next appointment online too.”
Send the link when rescheduling via phone or text
Encourage clients to save the link as a shortcut
3. QR Code in Studio
Print a QR code that links to your Workee page:
Put it at the front desk or waiting area
Include a CTA like: “Scan to Book Next Time – No Call Needed”
Final Checklist: Before You Launch Fully
Account created with logo, colors, and basic info
Services added with pricing, descriptions, and categories
Provider availability is accurate
Confirmation and reminder messages tested
Google and Meta pixels connected (optional)
Mobile and desktop flows tested by someone else
Link embedded or promoted across all client touchpoints
SEO metadata filled in for your booking page
QR code or printed handout available at front desk
Staff trained to mention booking link
Don’t Just Get Traffic — Turn It into Bookings and Revenue with Workee
Accept online bookings with no app required
Build a full website or embed into your existing one
Sell packages, products, and subscriptions
Sync schedules and assign services by provider
Send automated confirmations and reminders
Track performance with analytics and AI insights
Reduce no-shows with deposits or card-on-file protection
Support SEO and advertising workflows
Want help getting started?
We’ll walk you through setup, customize your booking flow, and make sure everything runs smoothly — step by step. 👉 Book Your Free Onboarding Call
You may also be interested in:
How to Reduce No-Shows at Your Med Spa (With a Clear Cancellation Policy + Free Template)
Streamlining Client Booking and Sales for Your Medspa
AI for Spa and Wellness Businesses: Practical Use Cases in 2025
Google & Facebook Ads for Med Spas: Guide to Attracting More Patients

Keep updated about latest industry insights and subscribe to our newsletter
Follow Us


