
Workee Manuals: How to manage your bookings – My Availability

Login to https://app.workee.net
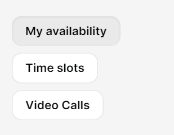
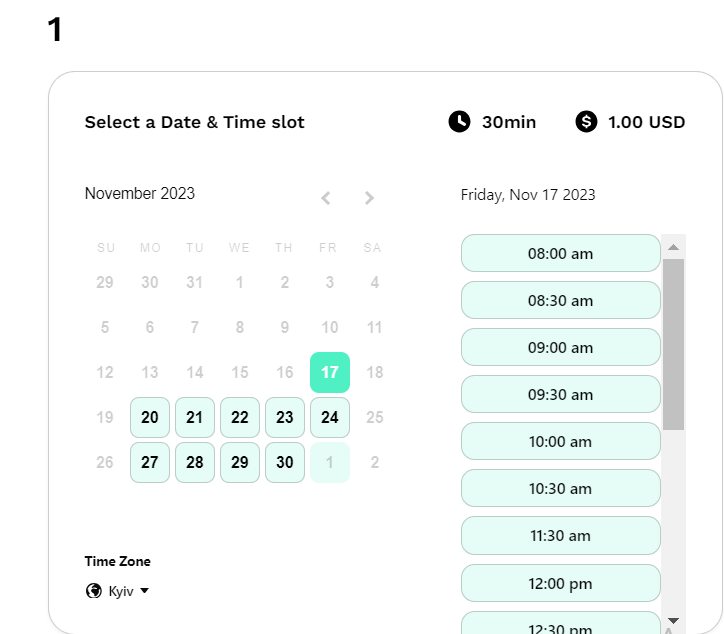
Open the ’’Bookings Tab’’ in the main menu.
Here you will find everything you need to set up Your Availability, Time Slots, and Video Calls.
Set Up Your Availability
Setting up your availability is easy. Here's a detailed guide on how it works:
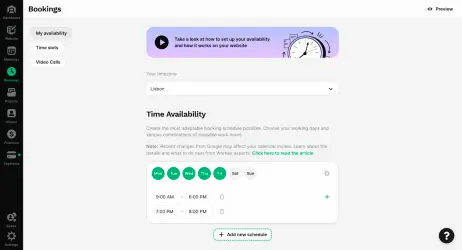
’’My Availability’’ has been selected by default. On this page, you can:
Change to your local Timezone.
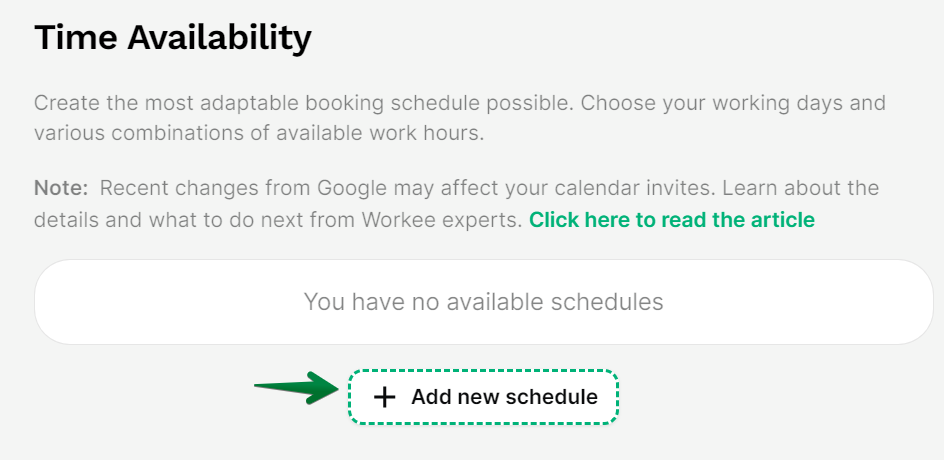
Choose, and adjust your available working days, and work hours using Time Availability
Select Date Overrides for days when your availability differs from your standard schedule.
Create advanced rules to maintain a healthy schedule using Rules For Your Availability.
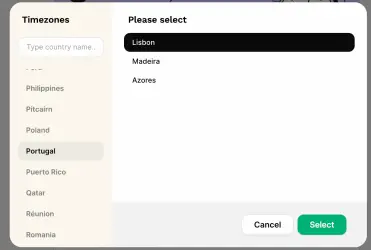
Change your Timezone
This section allows you to select or change to your local time zone.
Click the dropdown menu to choose Country and City.

Choose Country and City then click Select to finish.
For example in the image below, '’Portugal’' and '’Lisbon’' have been selected as the Country and City of Choice.
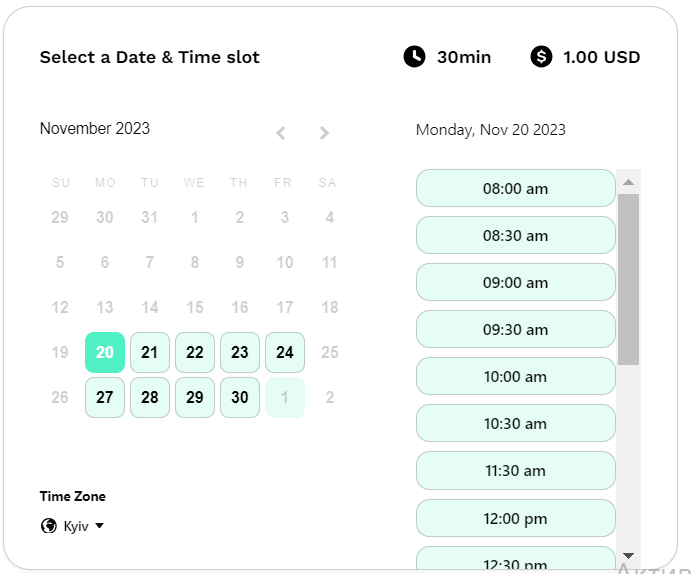
After completing the steps mentioned above, ''Your Timezone'' on your website will look like the image below to others.
Choose your Time Availability
This section shows when you're open for bookings. You can set and adjust work days and hours according to your availability.
Select the day(s) you will be available by clicking on the days listed below. For example, the image below shows that the following days have been selected.
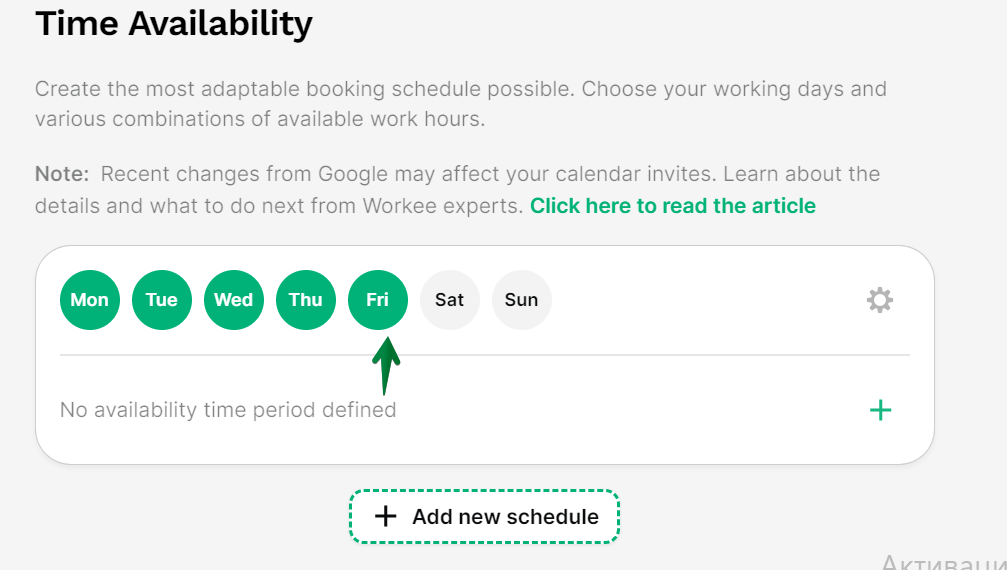
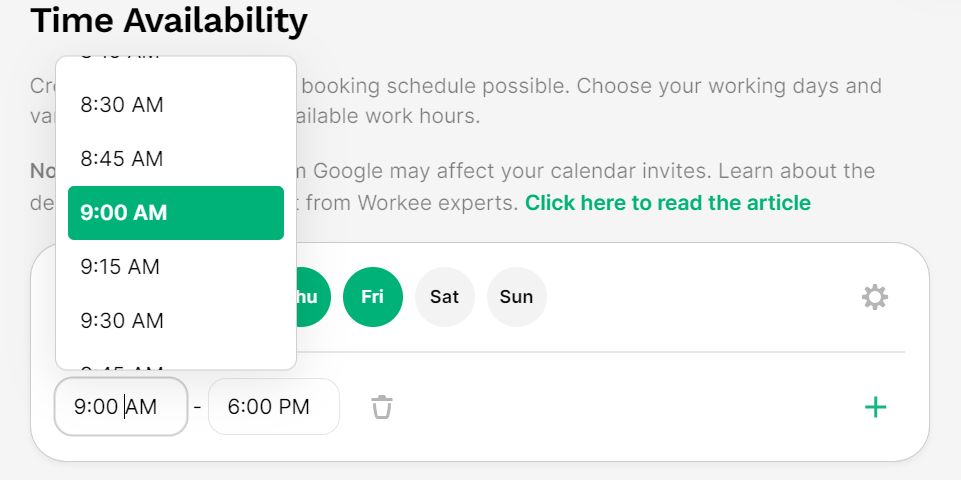
For each day, you can set specific work hours by choosing a start and end time, like '9:00 AM - 6:00 PM'.
You can also include multiple time frames using ’+’
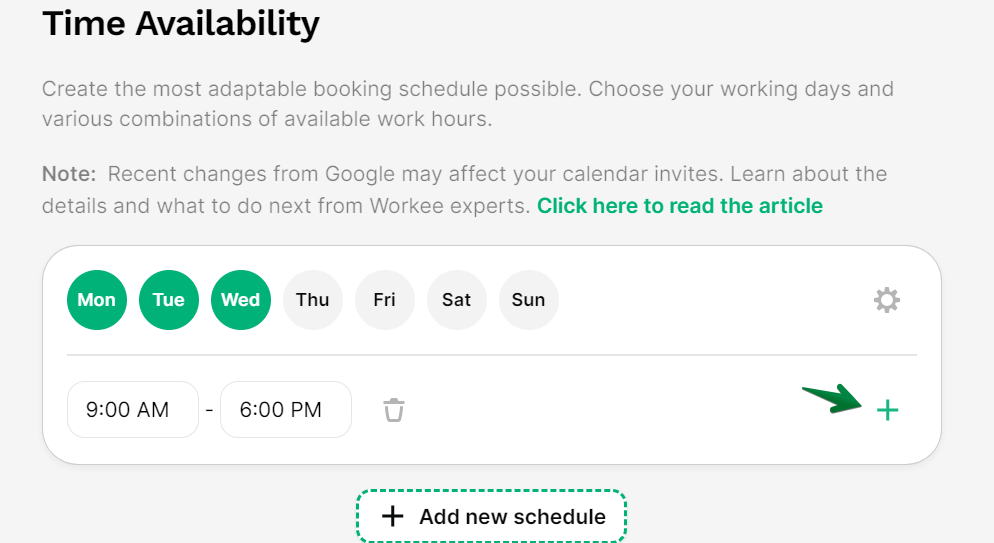
You can also delete any time frame you are not available using the ‘Bin’ icon
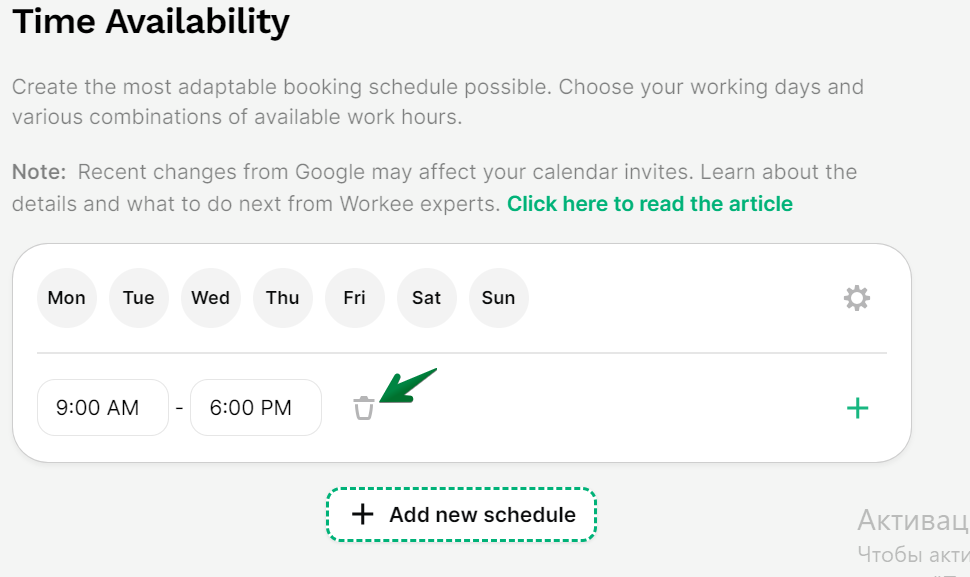
To add new schedules: Click '+ Add new schedule' to include more schedules.

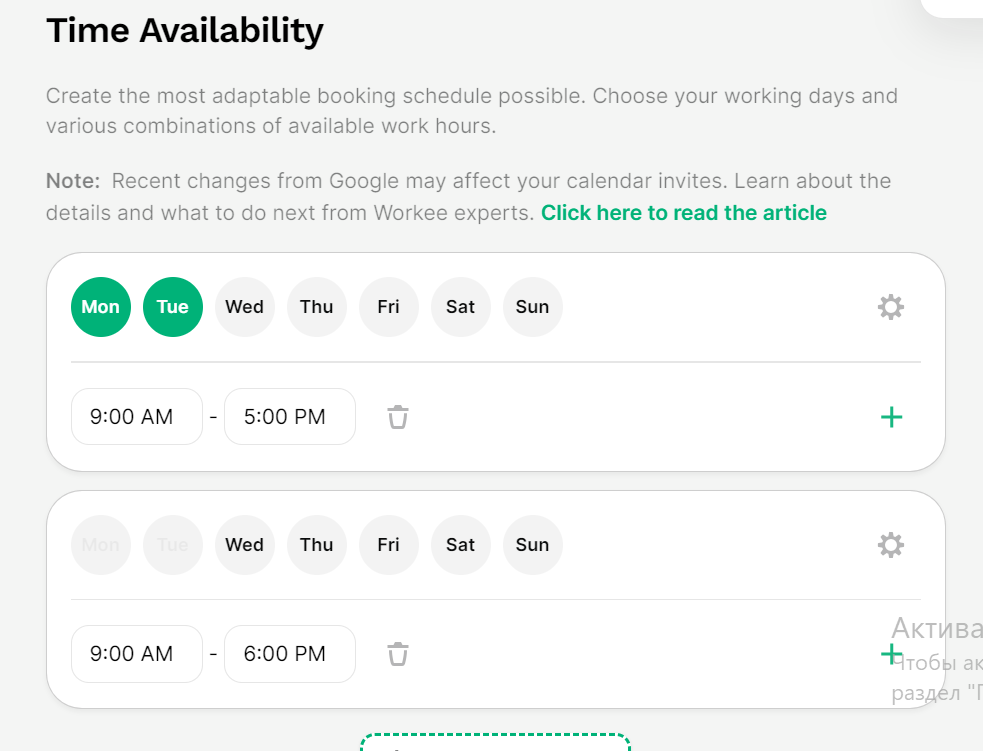
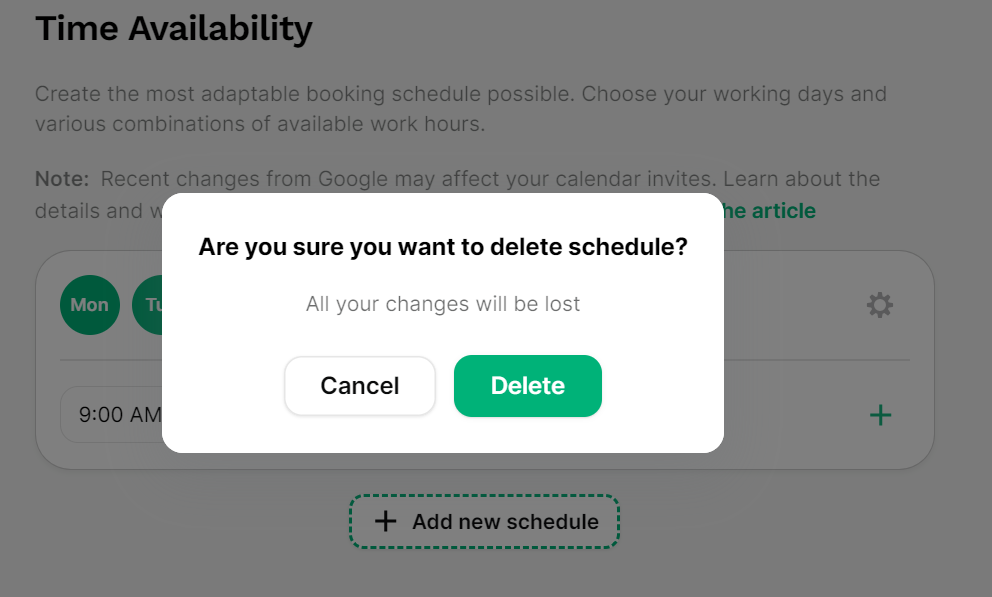
To delete or disable schedules: Click on the 'Settings Icon' to delete or disable schedules.
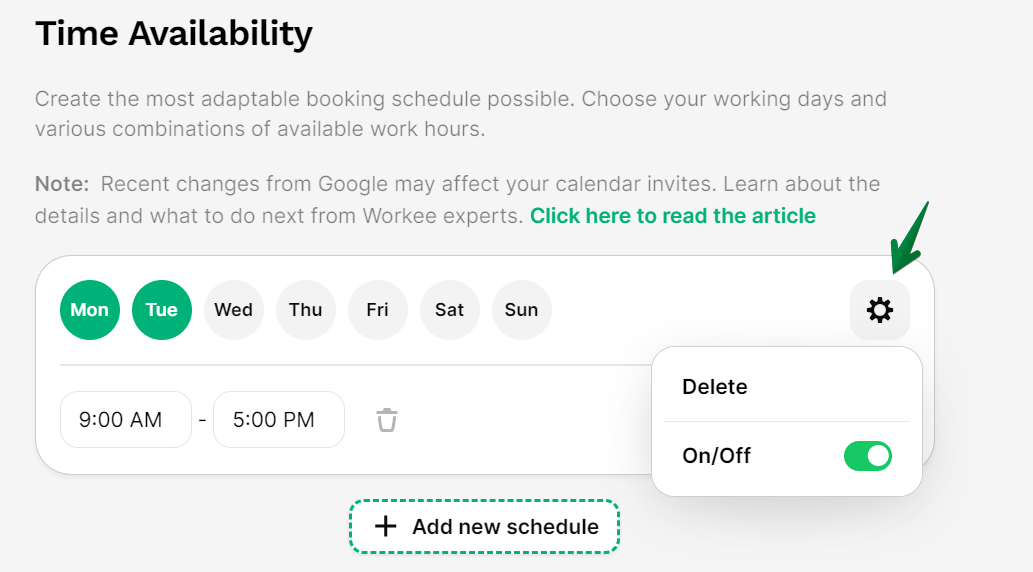
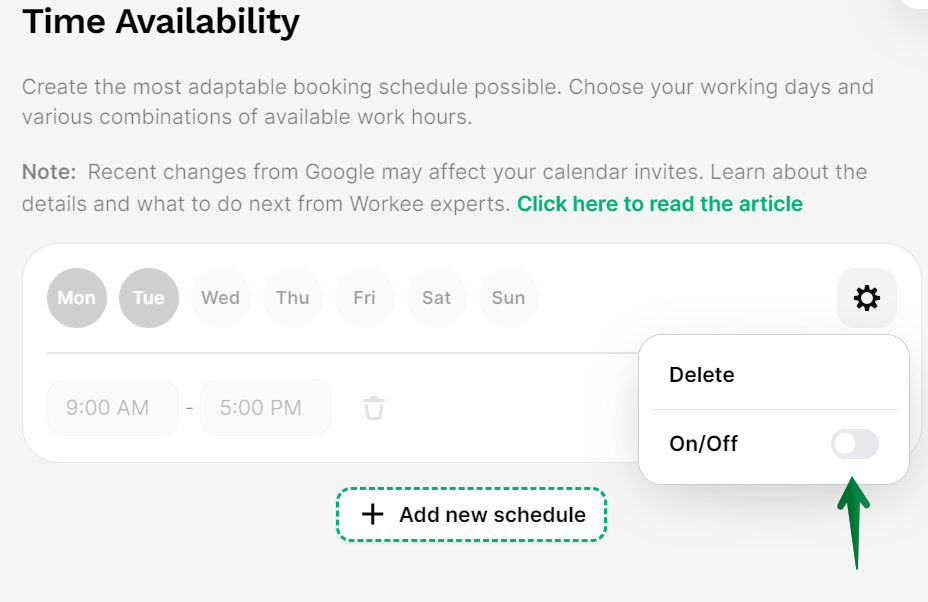
After completing the steps mentioned above, ''Your Availability'' on your website will look like the image below to others.
Note: My Availability feature is important for maintaining accurate availability. It allows clients to see when you are open for bookings and make schedules for your meetings.
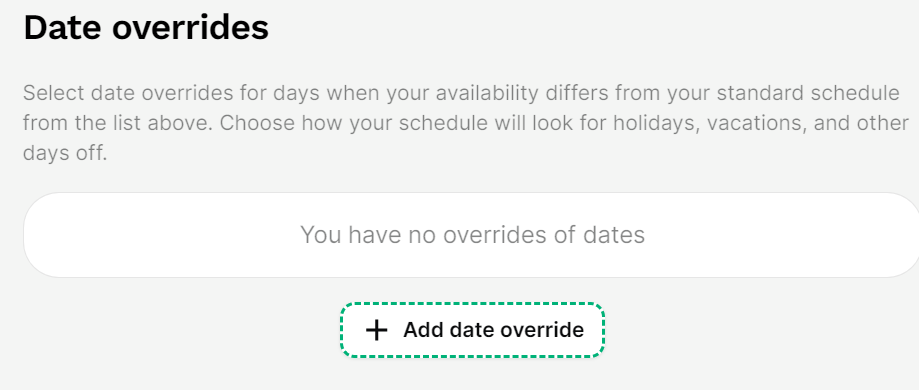
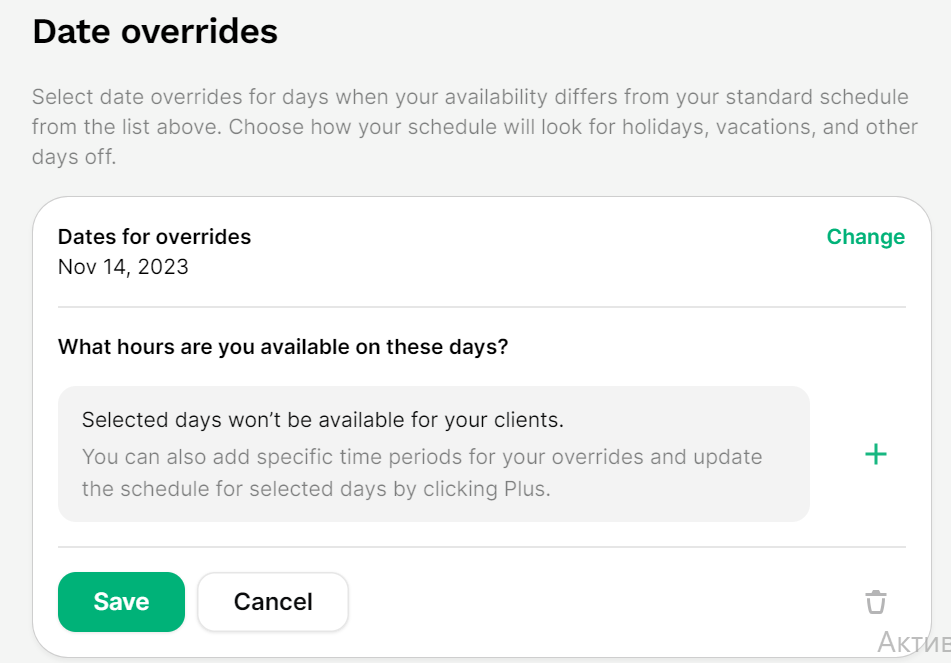
Date Overrides
The 'Date Overrides' allows you to set exceptions to your standard schedule for special days like holidays or personal time off.
No current overrides: Initially, it says 'You have no overrides of dates'. This means all days follow your standard availability. Click '+ Add date override' to create an exception. This is useful for holidays, vacations, or days off.
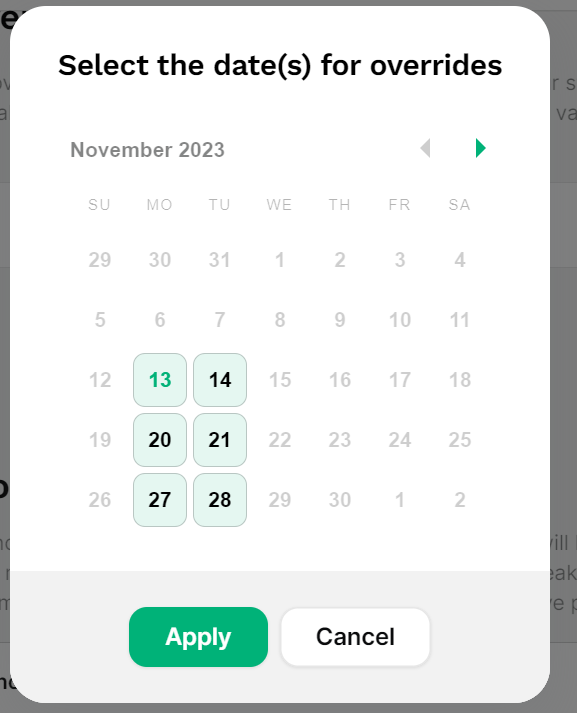
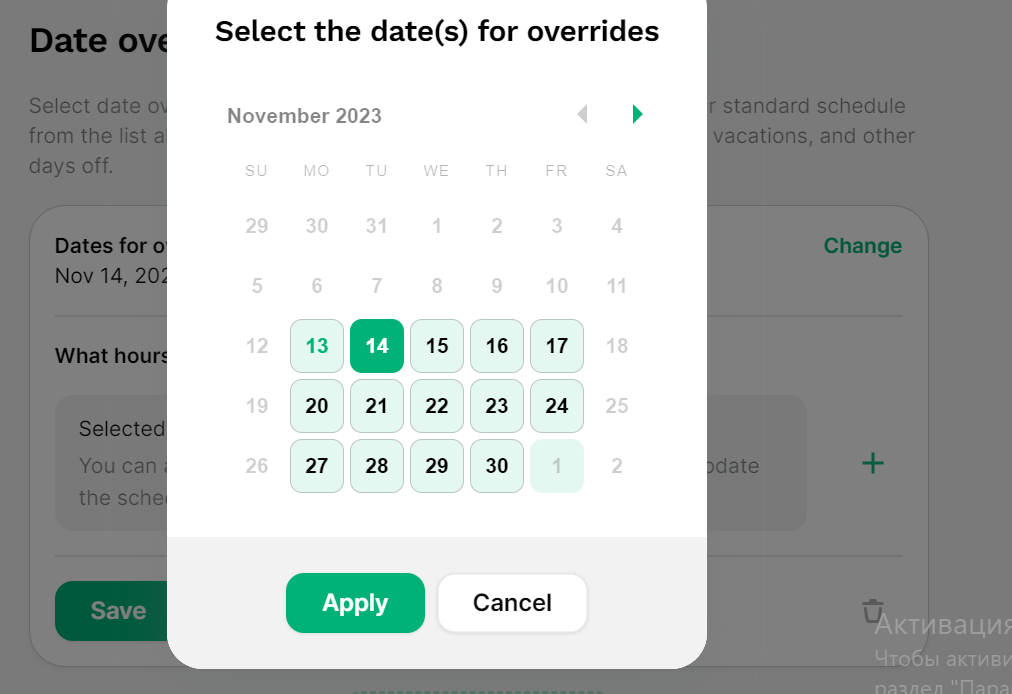
To select dates: When you click the '+ Add date override' button, a calendar pops up, allowing you to pick specific dates for these overrides.
Choose the date(s) that will differ from your usual schedule and click 'Apply'.
After selecting a date, specify the hours you're available. If you're taking the day off, you don't need to set any hours. Once you've chosen the date(s) and set the hours (if any), click 'Save' to lock in your overrides.
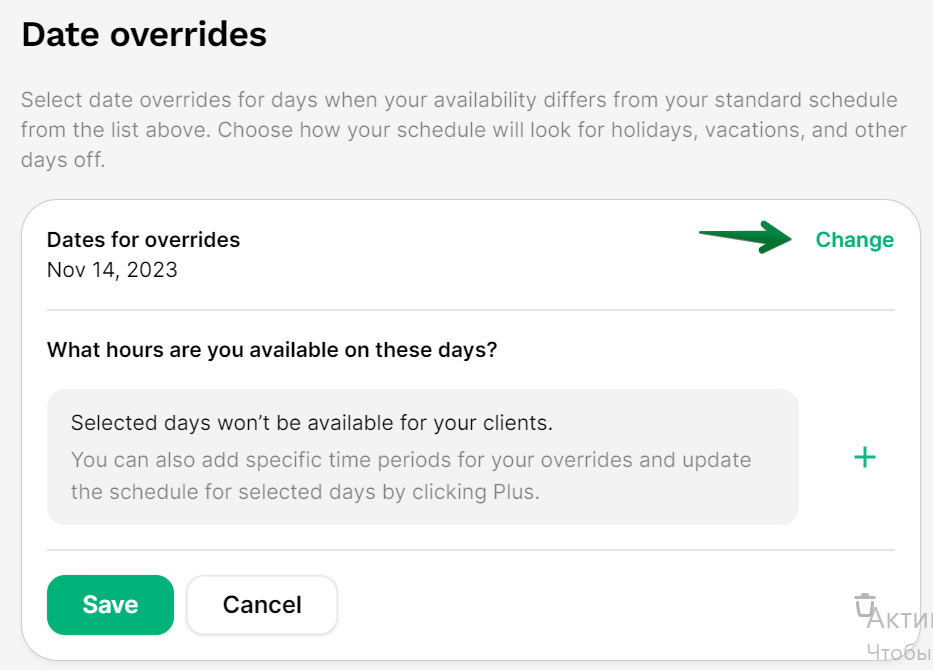
To edit Overrides: If you need to change anything, click 'Change' to select new date(s).
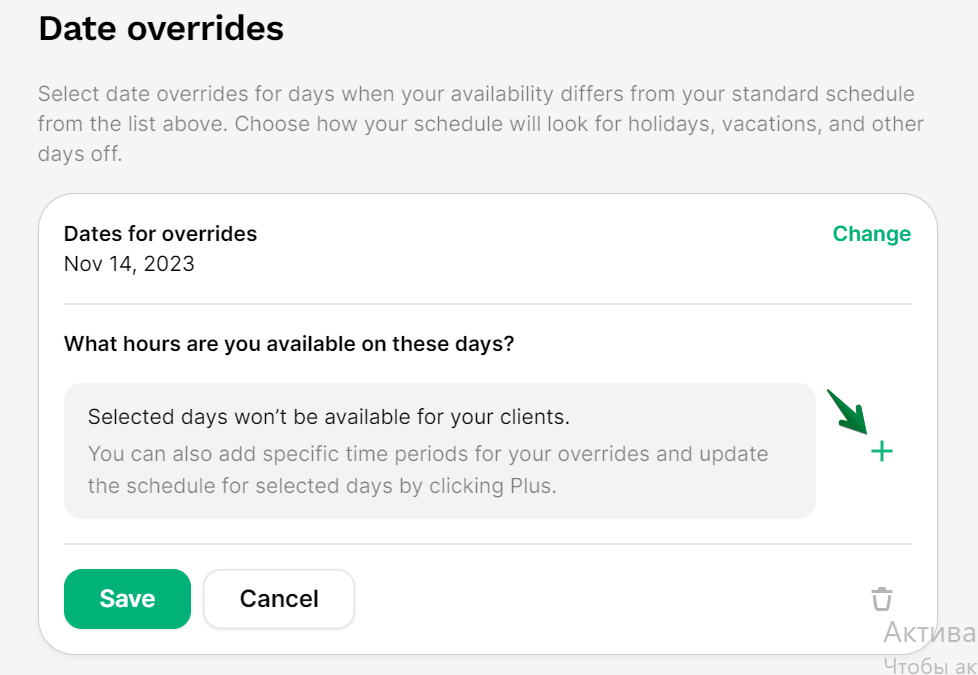
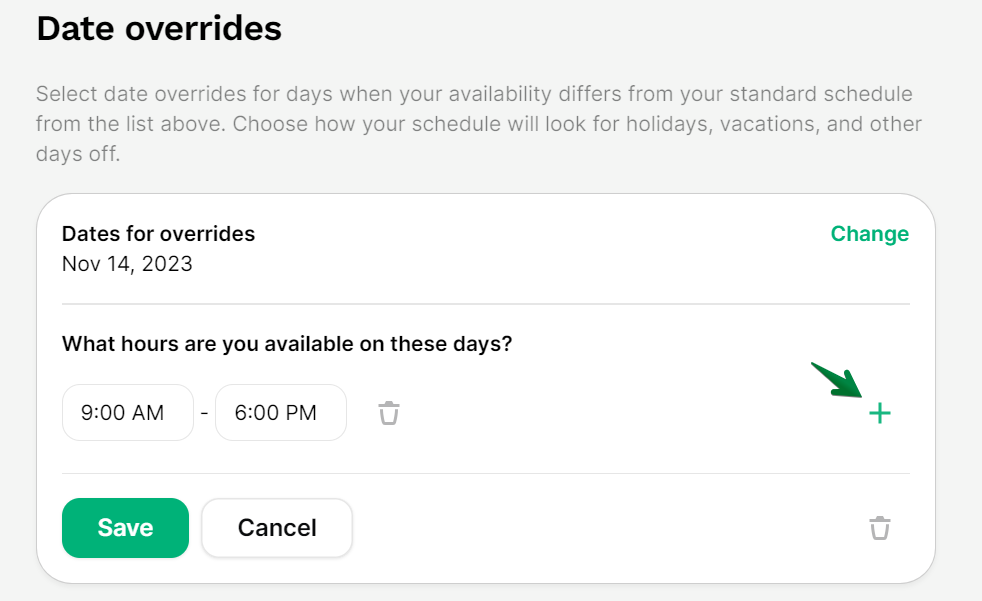
To specify periods for your overrides and update the schedule for selected days, Click
'+' to add.
To specify the hours you're available during your day off, Click '+' to add the new available times.
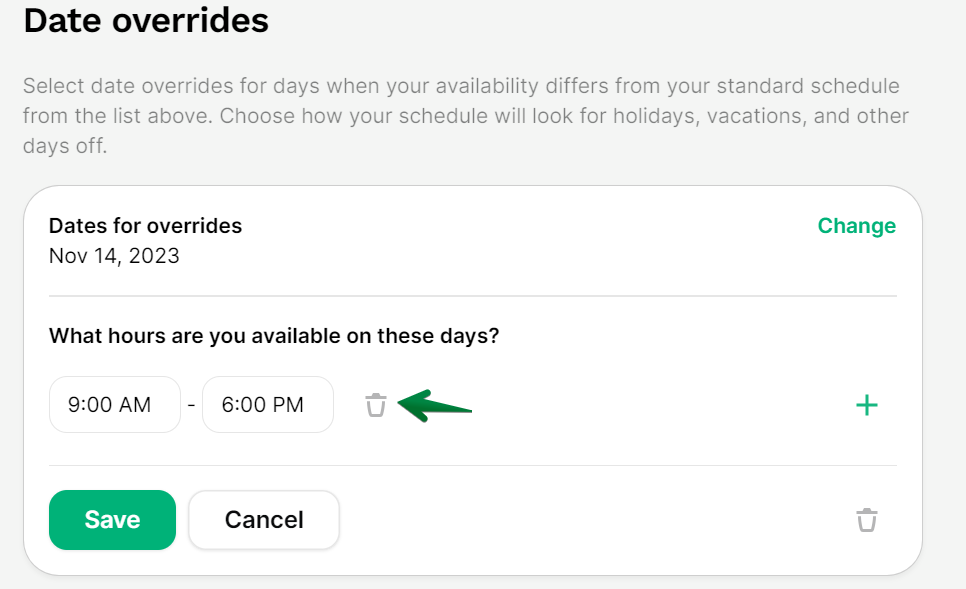
To delete the hours you're available during your day off, Click 'bin' to remove the specified times.
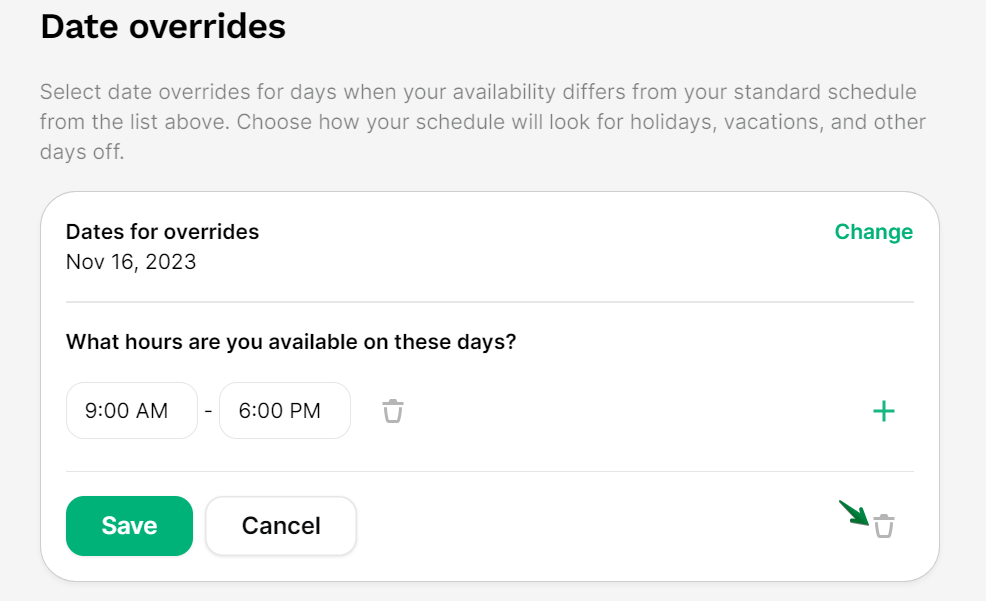
To delete Date Overrides completely, Click the 'bin' icon right next to the cancel button.
Review your changes and ensure everything looks good, then hit 'Save' to finalize your Date Overrides.
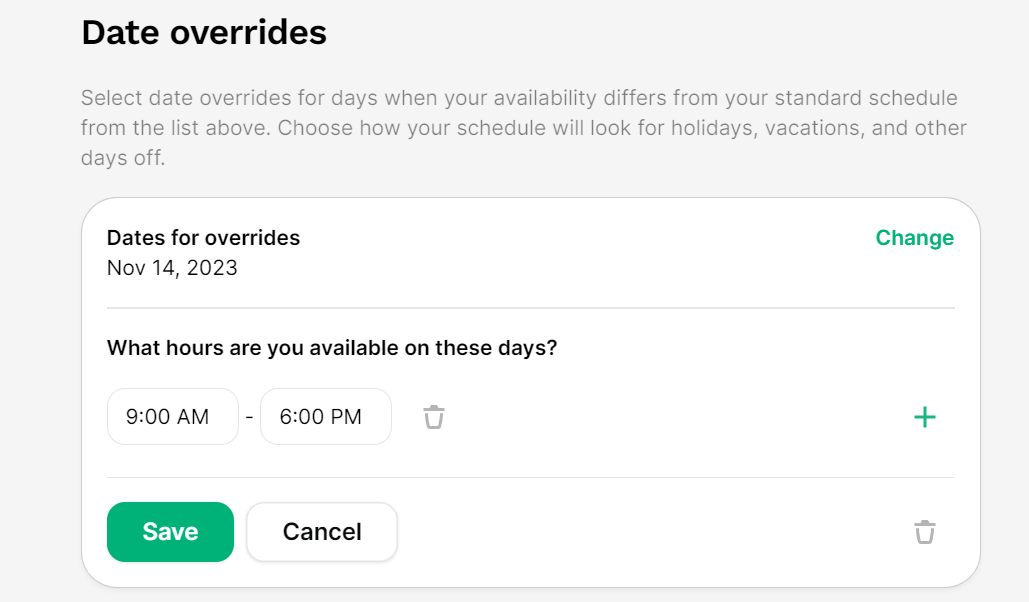
After completing the steps mentioned above, ''Date Overrides'' on your website will look like the image below to others.

Note: The Date Overrides feature is crucial for maintaining accurate availability and preventing bookings when you're not available. It helps set clear expectations for clients and avoids scheduling conflicts.
Rules For Your Availability
This section shows you how to set up advanced rules to manage your schedule efficiently and avoid last-minute bookings or cancellations.
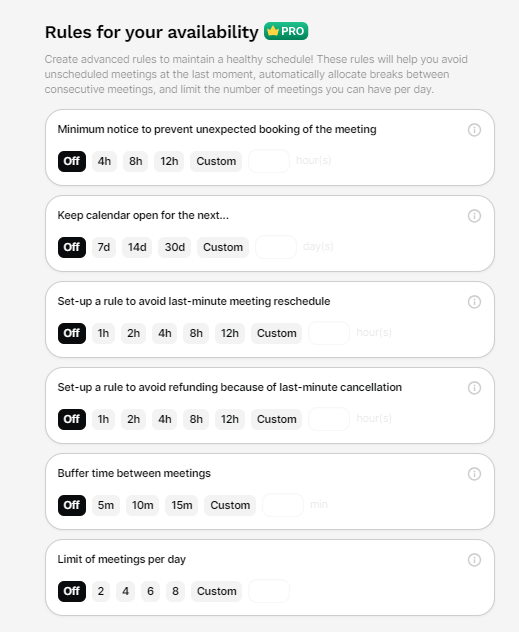
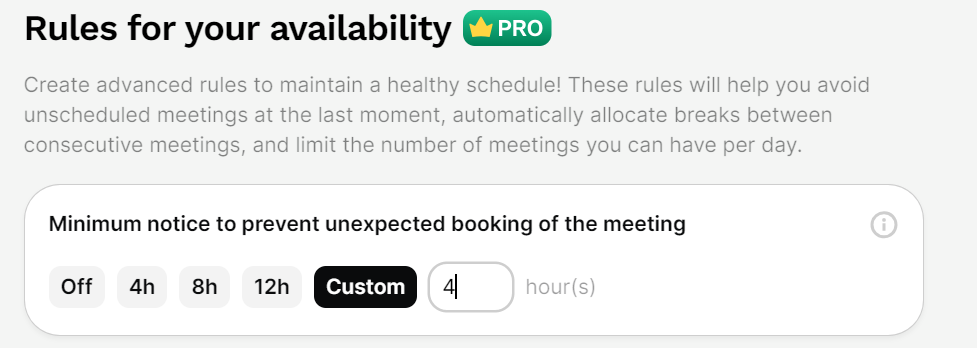
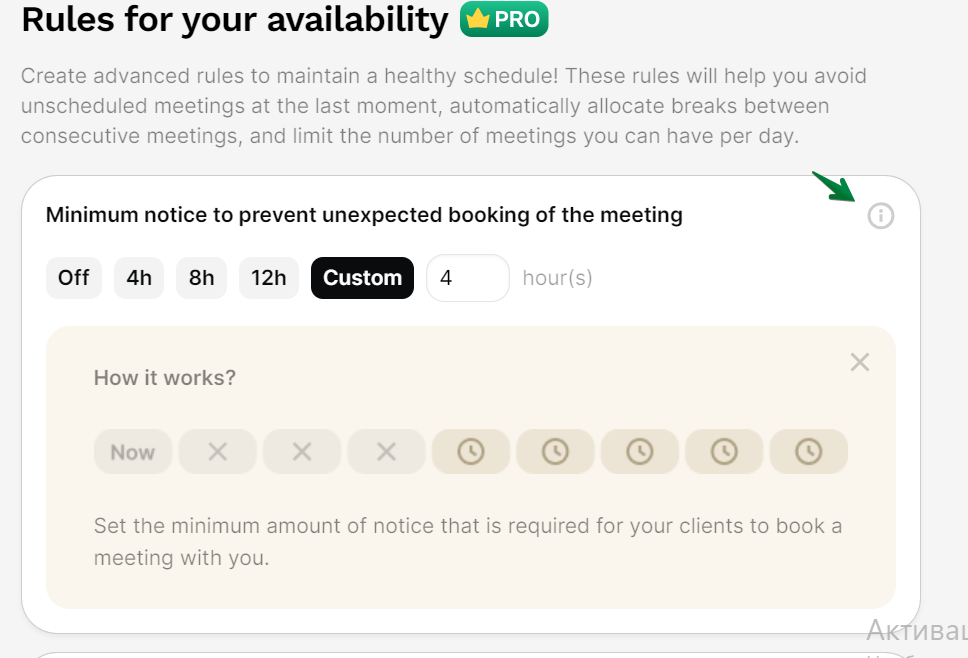
Minimum Notice for Bookings: Minimum Notice is Off by default. Set the minimum notice to prevent unexpected booking of the meetings with you.
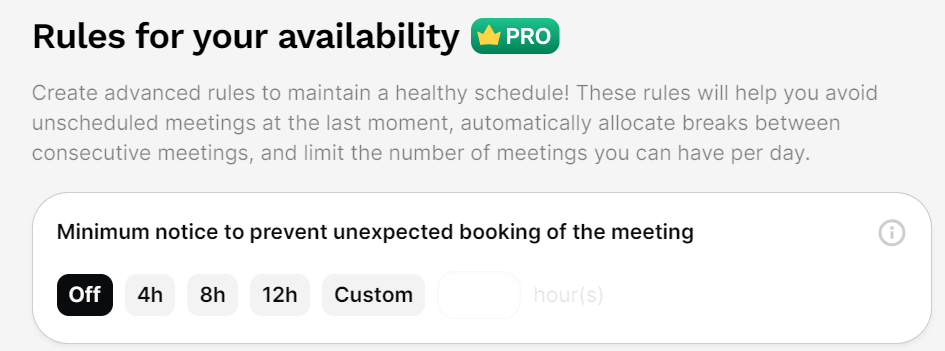
To give 'Minimum notice to prevent unexpected booking of meetings' click and choose from preset options (4h, 8h, 12h) or set a Custom time.

You can also click the ‘information icon’ to see how it works.
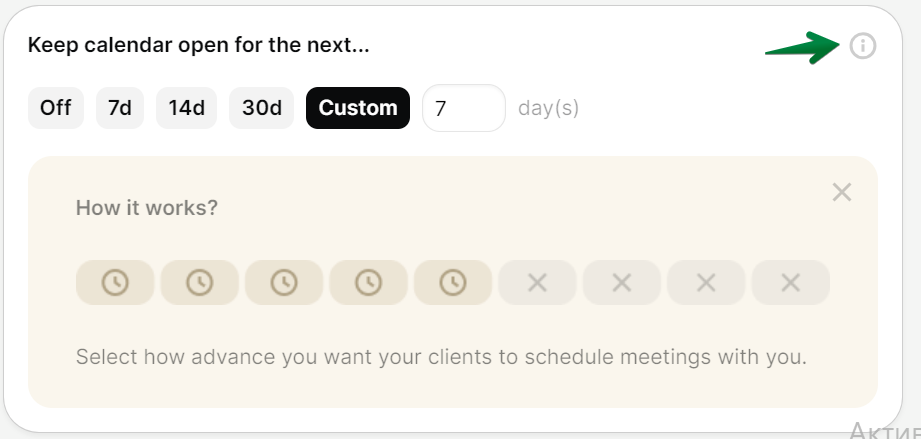
Decide how far in advance clients can book meetings by keeping your calendar open.

To give 'keep your calendar open during a timeframe' click and choose from preset options (7d, 14d, 30d) or set a Custom time frame.


You can also click the ‘information icon’ to see how it works.
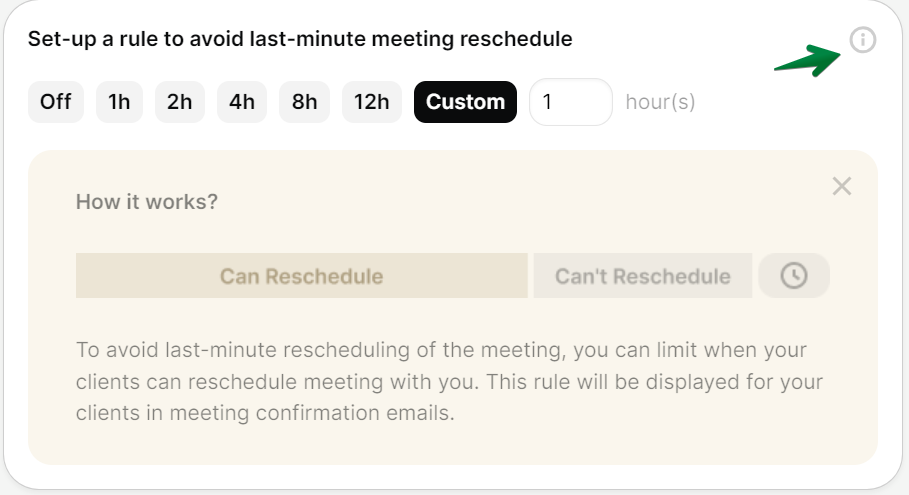
Set rules to avoid last-minute meeting rescheduling. This setting will block clients from rescheduling a meeting within the set time frame before the scheduled time.

To 'Set up a rule to avoid last-minute meeting reschedule' click and choose from preset hour options (1h, 2h, 4h, 8h, 12h) or select 'Custom' to enter a specific time.


You can also click the ‘information icon’ to see how it works.
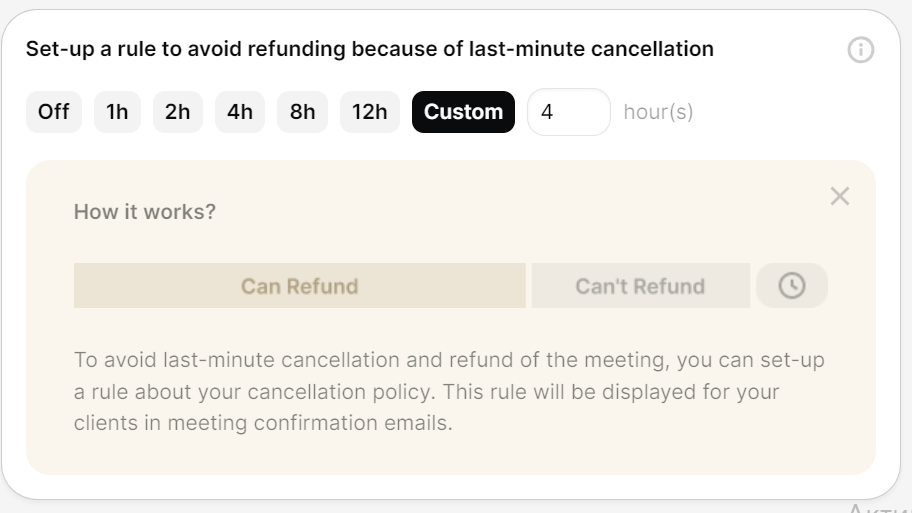
Set up a rule to avoid refunds due to last-minute cancellations. This rule ensures that you’re not obligated to issue a refund if a client cancels last minute within the set time frame.

To ‘Set up a rule to avoid refunding because of last-minute cancellation’ click and choose from preset hour options (1h, 2h, 4h, 8h, 12h) or select 'Custom' to input the number of hours you want as a minimum notice for cancellations to be eligible for a refund.


You can also click the ‘information icon’ to see how it works.
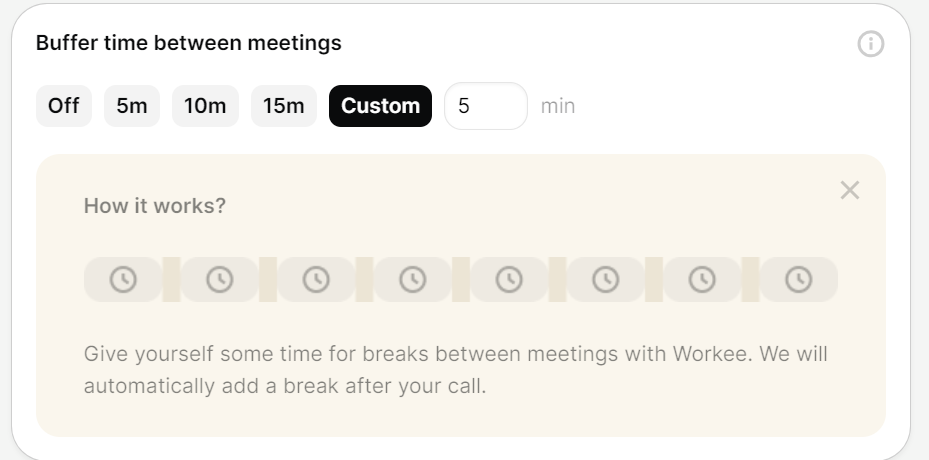
- Set up Buffer time between meetings: Buffer time gives you a breather between appointments, ensuring you’re not back-to-back without a break.

To set up Buffer time between meetings: Choose from preset durations (5m, 10m, 15m) or select 'Custom' and input the number of minutes you desire for a break between meetings.


You can also click the ‘information icon’ to see how it works.
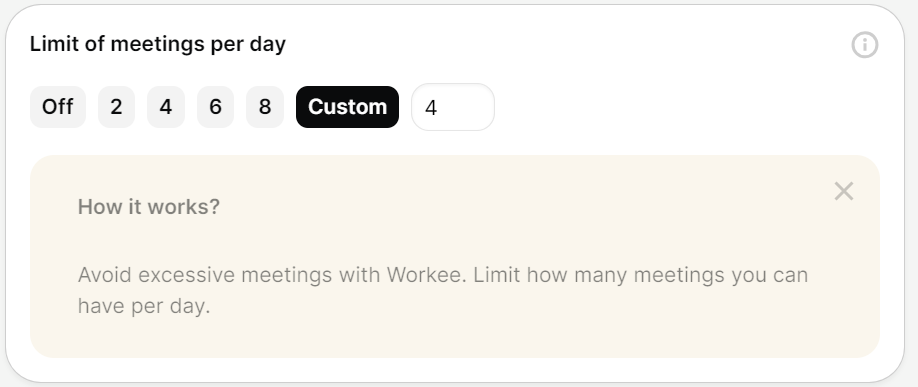
Put a Limit on Meetings Per Day: This setting prevents you from getting overbooked and helps manage your daily workload.

To Limit of meetings per day: Choose the maximum number of meetings you want to allow per day (2, 4, 6, 8), or pick 'Custom' to set a specific limit.


You can also click the ‘information icon’ to see how it works.
After completing the steps mentioned above, ''Rules For Your Availability'' on your website will look like the image below to others.

Note: Advanced rules for availability help you to maintain a healthy schedule! These rules will help you avoid last-minute unscheduled meetings, automatically allocate breaks between consecutive meetings, and limit the number of meetings you can have per day.
Check out this short video tutorial to manage your availability.

Keep updated about latest industry insights and subscribe to our newsletter
Follow Us


